This page provides support information on the Mobeye i110, Mobeye Argos and Mobeye Outdoor Alarm.
Click the  icon to find information about the subject.
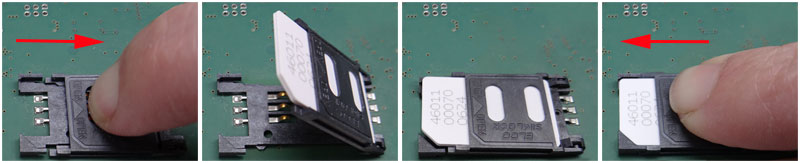
troubleshootinghow to place the SIM cardchoice of the SIM cardinstallation code vs user code(dis) arming by times scheduleshow to arm/disarm remotely?I lost my installation codewhat is passive infrared?what is the best position?what to do if a false alarm occurs?do I need to reset an alarm ?multiple sensors per inputconnection of siren or flash lightwhat is a relay output?LED behaviour (i110/Argos)LED behaviour (Outdoor Alarm)when to replace the batteries?what brand of batteries?manualsolder manualsdatasheetsdifferences between i110 and ArgosCE declaration of conformity sales informationinformation and intro videoregistration and user manualSIM/portal prices more portal supportSee the steps in the picture:
The Mobeye Argos and Mobeye i110 have an installation code and a user code. With the installation code you can change the settings and you can switch on and off. The factory code is “1111”. Change this to your own code upon commissioning. The user code is to turn on and off only. You can’t change settings with this code. The factory user code is “8888”. If the system is armed with the user code, it must be switched off with this one. The same goes for the installation code; the code that is used to switch on is the same as is needed to switch off.
The Mobeye Argos and Outdoor Alarm CMVXI-R can switch on and off automatically via a time schedule. This happens when the set time is “passed”. The system can still be turned on or off manually.
Example: The system shuts down at 8 am, according to schedule. You switch it off yourself at 7.30 am; it stays off at 8 am.
Example: the system is activated at 6 pm, as scheduled. Before this time you can do this manually. The schedule ensures that the system is active at night, even if you forget to do it manually.
There are two adjustable time schedules, which you assign to the days of the week. Monday counts as day “1”.
Example – to be activated on weekdays at night, and the entire weekend:
Arming Schedule1: 1800, Disarming Schedule1: 0700, DAYS1: 12345
Explanation: the system will switch on on Friday at 6 pm and off on Monday at 7 am. Schedule 2 is not used.
Example – to be activated on weekdays at night, partly at Saturday and the entire weekend:
Arming Schedule1: 1800, Disarming Schedule1: 0700, DAYS1: 12345
Arming Schedule2: 1700, Disarming Schedule1: 1400, DAYS2: 6
In a battery-powered Mobeye device the GSM module is switched off in standby mode. The system will be alert to detect intrusion and report it, but it cannot be accessed remotely. If the system has external power (possible for the Mobeye Argos and Outdoor detector), the GSM module is always open and you can switch it on and off via a text message command. There are additional options via the Mobeye Internet Portal. The alarm despatch can be adjusted there. An “switch on” or “switch off” command can also be set up for the Mobeye Argos, which will be executed after the next test message.
If you have forgotten the installation code for the Mobeye i110 or Argos, please contact us to reset it to factory settings. The settings will not change, only the code goes back to “1111”.
An understanding of passive infrared radiation is important for the correct placement of the alarm. Passive infrared does not see through windows. It notices a “moving heat source”. So watch out for drafts, smoldering fires and rattling mailboxes; these can be disruptive. Avoid direct sunlight on the lens, including through a window. Small animals (spiders, flies) are no problem as long as they are not on the lens. A dog will be seen by the Mobeye i110 and Argos. So turn the lens away from where they come (a dog usually stays low), preferably in another room.
The Mobeye Outdoor Detector is immune to disturbances such as leaves, snow, headlights. Birds, cats and (small) dogs are also not seen, because the device has two detectors. Only if both perceive something, it will be validated and an alarm will follow. The Mobeye Outdoor Detector must be hung at a height of 1.5 meters to have the double detection work properly.
A false alarm does does not occur due to a user error comes from a disruptive source. To prevent an alarm from being taken seriously, a false alarm should always be understood and the cause removed. See “the best position …” for tips. If you doubt the device, put it in a place where it can’t see a movement (in a cabinet or in the box) with the system turned on.
After a burglary detection and alarm reporting, the Mobeye burglar alarm will be inactive for 5 minutes and will not detect any new movements. After this it is automatically sharp again. So it does not need to be reset manually. This inactive period can be shortened or extended in the Mobeye Argos and Outdoor Detector.
Multiple sensors can be connected to one NO/NC alarm input. Place a normally closed input contact in series, a normally open contact in parallel. In this way, an activated sensor will trigger an input alarm. Since there is one text per input, it does not provide specific information about the activated sensor.
If a device is fully battery operated, without external voltage, the batteries should last at least one year. This is even with a daily (test) report. If the GSM strength on site is weak, it may be shorter. Like any mobile phone, the internal GSM module will boost the power to find signal. This affects battery usage.
If a device is externally powered and the batteries are used as a backup in the event of a power failure, they will last much longer. This is more than 3 years for the latest Mobeye devices.
A message follows at low battery voltage. For devices that are connected to the Mobeye Internet Portal, this is a “service notification”. If it is missed, the absence of a test message (“keep alive”) is a second indicator. A standalone device sends the low battery notification to the first telephone number (TEL1).
You will find the latest manuals on the documentation page. Are you looking for manuals for an earlier version? Consult us.
The Declaration of Conformity can be found at the end of the product manual. You will find the latest manuals on the documentation page.